
How to Install a Chimney Cap
Key Takeaways
- Most single flue caps can be installed by a homeowner in under an hour with a nut driver or screwdriver, if the roof is safe to work on.
- Safety comes first: dry calm weather, a secured ladder, a roof harness on steep or high roofs, and a cold chimney.
- Measure first, sweep and inspect the flue, then fit the cap so it sits level and tight with no gaps.
- Brick chimneys with clay tile take bolt-on caps; liners take clamp or slip-in caps; metal chimneys take the listed cap that locks onto the pipe; multi flue caps anchor to the crown.
- Hire a chimney sweep for steep or tall roofs, multi flue caps, damaged crowns or tiles, and prefab systems you cannot identify.
Installing a chimney cap is one of the simplest chimney jobs, and one of the most dangerous because it happens on a roof. The cap itself usually goes on in minutes. The work is in getting up there safely, measuring correctly and making sure the flue is clean before you cover it. If you haven’t picked a cap yet, start with our best chimney caps list so you buy one that’s easy to fit.
This guide walks through how to install a chimney cap on every common chimney: brick chimneys with clay tile, relined chimneys, multi flue crowns and metal prefab chimneys. It also covers when to call a professional.
Can You Install a Chimney Cap Yourself?
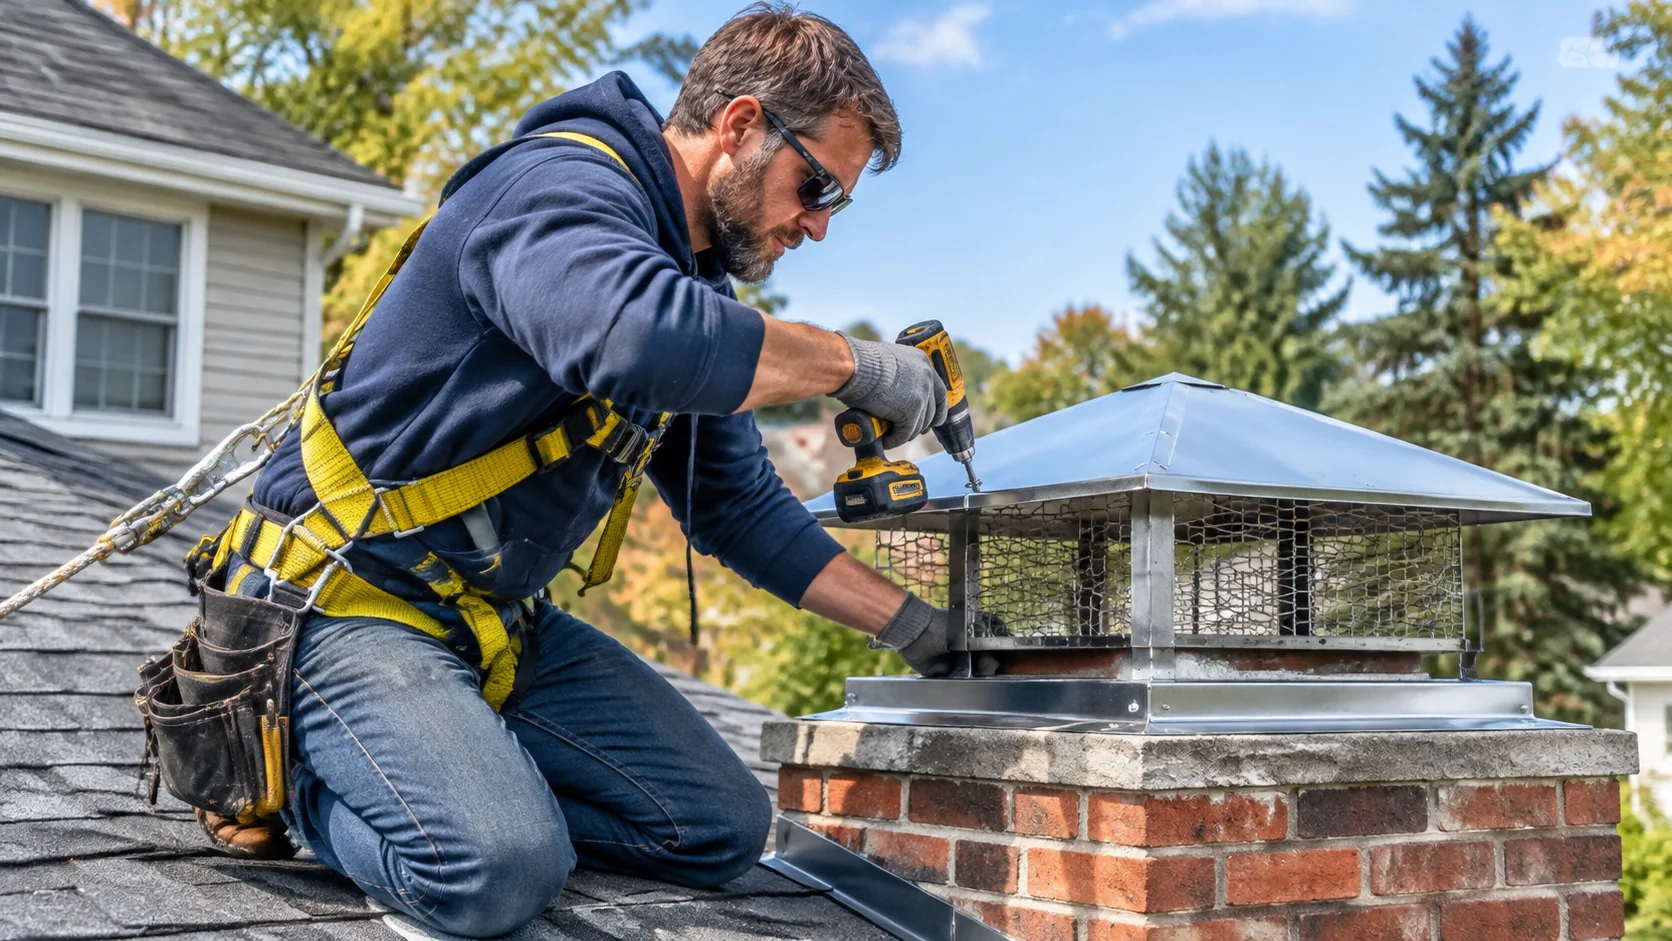
Yes, most single flue chimney caps are designed for homeowner installation. Bolt-on caps for clay tiles and clamp-on caps for liners need only a nut driver, screwdriver or wrench. If you can safely get onto your roof and reach the chimney top, you can usually install one in under an hour.
You should hire a chimney sweep or roofer if:
- The roof is steep, high, slate, tile or metal.
- The chimney is tall or far from a safe ladder position.
- You need a multi flue cap anchored to the crown.
- The flue tile or crown is cracked or crumbling.
- You have a prefab chimney and cannot identify the cap.
- The chimney has not been inspected or swept recently.
Safety First
Falls from roofs are a leading cause of serious home improvement injuries. Take these steps every time.
Choose the Right Day
- Dry roof, no rain, frost, ice or dew.
- Light wind. Caps catch the wind like a sail when you lift them.
- Daylight with time to spare.
Use the Right Ladder
- Extension ladder rated for your weight plus tools.
- Set at about a 4 to 1 angle: 1 foot out for every 4 feet up.
- Extend at least 3 feet above the roof edge.
- Tie off the top if you can, and have a helper foot it.
Use Fall Protection
- A roof harness with a properly installed roof anchor on steep or high roofs.
- Soft soled shoes with good grip.
- A tool bag or belt so your hands are free on the ladder.
Make Sure the Chimney Is Cold
Let any fire go out at least 24 hours before. Flue tops can be hot enough to burn, and hot gases can make you dizzy. Close the damper to stop debris falling into the house.
Tools and Materials
- The correct size cap, plus the fasteners supplied.
- Nut driver, socket or screwdriver to match the bolts.
- Tape measure.
- Wire brush or stiff nylon brush.
- Drill with masonry bit and stainless anchors (multi flue caps).
- High temperature silicone or masonry adhesive if the maker calls for it.
- Work gloves and safety glasses.
- Phone for photos.
Before You Install: Measure, Sweep and Inspect
Measure
Measure the flue before buying the cap. For clay tile, measure the outside length and width and how far the tile sticks up. For liners and pipe, measure the inside diameter. For multi flue, measure the crown and tallest flue.
Sweep and Inspect
Do not seal in a dirty or damaged flue. NFPA 211 recommends a chimney inspection every year. If the chimney has not been swept or inspected recently, have it done before or at the same time as the cap. A sweep can spot:
- Creosote buildup.
- Nests or debris.
- Cracked tiles or a damaged crown.
- A missing or damaged liner.
Check for Animals
Never cap a chimney with animals inside. Listen for noise, check for nests and wait until birds or animals have left. Chimney swifts are federally protected.
How to Install a Chimney Cap on a Brick Chimney (Clay Tile)
This is the most common installation: a bolt-on single flue cap on a clay flue tile.
Step 1: Back the Bolts Out
On the ground, loosen the bolts or screws on the cap’s base so they will not catch on the tile. Check all parts are there.
Step 2: Carry the Cap Up Safely
Carry the cap in a bag or lift it with a rope once you are on the roof. Do not climb a ladder holding a cap in one hand.
Step 3: Clean the Top of the Tile
Brush loose debris, creosote and old mortar off the outside of the tile where the base will sit.
Step 4: Set the Cap Over the Tile
Lower the cap straight down over the tile until the base rests on the crown or the tile shoulders, as the maker’s instructions show. The cap should sit level, not tilted.
Step 5: Center the Cap
Make sure the gap between the base and the tile is even on all sides.
Step 6: Tighten the Bolts Evenly
Tighten opposite bolts a little at a time, like the lug nuts on a car wheel, so the cap stays centered. Tighten until snug against the tile. Do not overtighten: clay tiles can crack.
Step 7: Check the Fit
Try to lift and rock the cap by hand. It should not move. Look around the base for any gap an animal could use.
Step 8: Check the Lid and Mesh
Make sure the lid is level and the mesh is straight, not bent from handling.
How to Install a Chimney Cap on a Clay Flue Tile with a Band
Band style caps have a strap that wraps around the tile instead of bolts.
- Loosen the band fully.
- Set the cap over the tile.
- Wrap the band around the tile below the mesh.
- Tighten the band’s screw or ratchet until snug.
- Check the cap is level and does not move.
The HY-C Shelter Pro uses a 2 1/4 inch tall locking band, which grips a bigger area of tile.
How to Install a Chimney Cap on a Stainless Liner
Relined chimneys usually have a round stainless liner and a top plate.
Step 1: Check the Top Plate
The top plate seals the crown around the liner. Make sure it is fastened and sealed.
Step 2: Fit the Cap
Slide the cap’s collar over or into the top of the liner, or onto the top plate’s collar, as designed.
Step 3: Fasten It
Tighten the clamp or drive the supplied screws. Use stainless fasteners only.
Step 4: Check
The cap should be centered, level and tight.
How to Install a Chimney Cap on a Metal Chimney
Prefab and Class A chimneys use the cap made for that pipe. Most attach in one of three ways:
- Twist lock: align the cap’s tabs with the pipe and turn to lock.
- Snap or press fit: push down until it locks, then add any screws the maker requires.
- Screw-on: set the cap and drive the supplied screws through the collar.
Follow the maker’s instructions exactly, including the number and type of screws and the minimum overlap. Do not drill extra holes in the inner pipe wall.
Storm Collar
If the chimney passes through a chase cover or roof flashing, check the storm collar above it. It should be tight and sealed with high temperature silicone.
How to Install a Multi Flue Chimney Cap
Multi flue caps are larger, heavier and fastened to the crown. Many homeowners hire this out.
Step 1: Inspect and Repair the Crown
The crown must be solid. Fill cracks or repair the crown first.
Step 2: Assemble the Cap If Needed
Knock down caps, like the HomeSaver multi flue cap, ship flat. Assemble on the ground following the instructions.
Step 3: Set and Position
Set the cap on the crown so it covers all flues with an even margin and the lid is level.
Step 4: Mark Anchor Points
Mark through the base flange holes onto the crown.
Step 5: Drill and Anchor
Lift the cap aside, drill with a masonry bit, then set stainless masonry anchors or the fasteners supplied. Some caps use high temperature adhesive instead of or as well as anchors. Use what the maker specifies.
Step 6: Fasten and Check
Fasten the cap down and check it is level, tight and clear of every flue.
How to Install a Chimney Cap Without Screws
Some caps do not use screws or bolts:
- Band clamps tighten around the tile.
- Friction fit collars slide into a liner.
- Adhesive bonds a multi flue cap to the crown.
Friction fit alone is risky in windy areas. If your cap relies on friction, check the maker’s instructions for a backup fastener. Never tape or wire a cap in place as a long term fix.
Can You Install a Chimney Cap Without a Flue?
If the chimney has no flue tile or liner, there is nothing for a standard single flue cap to grip. Options are:
- A multi flue or crown mount cap that anchors to the crown.
- Relining the chimney, which comes with a top plate and cap.
- A top seal if the chimney will never be used.
An unlined chimney should not be used for fires until a sweep inspects it.
Can You Install a Chimney Cap in Winter?
You can, but only on a dry, calm day with no ice or snow on the roof, and with the chimney fully cold, which means no fires for at least a day. Cold makes adhesive and silicone slow to cure. Check the product’s minimum temperature. Many sweeps prefer to fit caps in late summer or fall, before heating season.
How Long Does It Take to Install a Chimney Cap?
- Single flue bolt-on cap: usually under an hour on the roof.
- Liner cap: similar, often less.
- Prefab cap: minutes once on the roof.
- Multi flue cap: a few hours with anchoring.
Add time for getting set up safely, sweeping and inspecting.
After Installation: Checks
From the ground, look at the cap with binoculars. It should be level and centered. Light a small fire on a calm day and watch:
- Smoke should leave evenly through the mesh.
- No smoke should spill into the room.
- No rattling in the wind.
Check again after the first big storm.
When to Call a Professional
Call a chimney sweep or roofer if:
- You are not confident on the roof.
- The roof is steep, wet, high or made of fragile material.
- The tile or crown is damaged.
- You need a multi flue cap.
- You cannot identify a prefab chimney system.
- The chimney needs sweeping or inspection anyway.
Professional installation usually adds about $100 to $200 to a simple cap, according to Angi’s chimney cap cost data. Multi flue and complex jobs cost more.
Is It Cheaper to Install a Chimney Cap Yourself?
Doing it yourself saves the installation fee, which is often a third or more of the total for a simple cap. It costs nothing extra if you already own a suitable ladder and harness. If you need to buy safety gear, the saving shrinks. A professional also inspects the chimney while on the roof, which can catch problems early. For a simple, accessible single flue cap, DIY is usually cheaper. For anything else, the fee is worth it.
Common Installation Mistakes
- Wrong size cap. Measure first.
- Overtightening bolts and cracking the tile.
- Uneven tightening, leaving the cap off center.
- Capping a dirty or occupied flue.
- Using non stainless fasteners that rust.
- Skipping the crown repair before a multi flue cap.
- Mixing brands on prefab chimneys.
- Working in wind or on a wet roof.
How to Replace an Old Cap
If you are replacing a cap, remove the old one first: loosen the bolts, lift it off and lower it safely. Clean the tile, check it for damage, then install the new cap. The full process, including rusted bolts and stuck caps, is in chimney cap replacement.
Installing on Different Chimney Finishes
Stone Chimneys
Stone chimneys often have uneven crowns and irregular flue heights. Single flue caps that clamp to the tile work the same way as on brick. For multi flue caps, the crown may need leveling or shims so the cap sits flat. Use masonry anchors suitable for the stone and avoid drilling near edges where stone can split.
Stucco Chimneys
Stucco chimneys may hide a masonry or a framed chase underneath. Check which you have before buying. If it is a framed chase with a metal flue, you need the listed cap for the pipe and a chase cover, not a masonry cap.
Oval Flues
Oval flues need an oval cap or an adapter. Measure the long and short sides of the oval and match them to the maker’s fit range. Do not force a round or square cap onto an oval tile.
Installing a Top Mount Damper Cap
Top mount damper caps combine a cap and a sealing damper. The general process is:
- Measure the flue and confirm the model fits.
- Feed the cable down the flue from the top to the firebox.
- Seat the damper frame on the flue tile, usually with high temperature silicone so it seals.
- Attach the cap and lid.
- Mount the handle inside the firebox.
- Test that the lid opens fully and closes tightly.
Follow the maker’s instructions closely, because a damper that does not open fully can fill the house with smoke. Many people leave this job to a sweep.
Installing a Rotating Wind Cap
Rotating caps are heavier at the top and have moving parts:
- Make sure the base is fastened very securely.
- Check the cap spins freely by hand after installation.
- Confirm there is clearance for the head to rotate without hitting anything.
- Lubricate the bearing if the maker recommends it.
Installing on a Steep Roof
On steep roofs, standing up safely may not be possible. Options include:
- Roof brackets and planks to create a level work area.
- Roof ladders that hook over the ridge.
- A boom lift for very high chimneys.
- Professional installation.
If the roof is steeper than you are comfortable working on, stop and call a sweep.
Installing on Slate, Tile and Metal Roofs
Slate and clay tile break easily when walked on, and metal roofs can be slippery and dent. Professionals use special techniques, such as roof ladders and padded supports. Avoid walking directly on these roofs if you can.
Tool Tips
- Nut driver sized for the cap bolts is faster than a wrench.
- Magnetic tool tray keeps bolts from rolling off the roof.
- Tool lanyard stops tools from falling.
- Bucket on a rope to haul the cap and tools up.
- Wire brush to clean the tile top.
Installation Checklist
- Chimney cold and appliance off.
- Ladder secured and extended above the roof edge.
- Harness and anchor in place.
- Flue measured and cap size confirmed.
- Flue inspected for animals, nests and damage.
- Tile or crown cleaned.
- Cap centered and level.
- Bolts tightened evenly.
- Cap does not move when pushed.
- Lid and mesh intact.
- Tools and packaging carried down.
- First fire watched on a calm day.
How to Know It Is Installed Right
From the ground, the cap should look straight and centered. From inside, the first fire should draw as well as or better than before. No smoke should spill, and you should hear no rattling in wind. If anything seems off, check the fit again before relying on it.
Recording Your Installation
Write down the brand, model, size and date, and keep the receipt and warranty. Take a photo of the installed cap. This makes future warranty claims and replacement much easier.
Installation Questions
Do I Need Sealant or Caulk?
Not for most clamp on caps. They are held by bolts or a band. Top mount damper caps usually use high temperature silicone to seal the frame. Multi flue caps may use masonry anchors and sometimes sealant at the base, as the maker directs. Do not use ordinary caulk on hot flue parts.
Should the Cap Touch the Crown?
Single flue caps fit around the tile and usually sit just above the crown or rest on it lightly. Multi flue caps sit on the crown. Follow the maker’s instructions for the cap you buy.
How Tight Should the Bolts Be?
Snug enough that the cap cannot move, but not so tight that clay tile cracks. Tighten opposite bolts a little at a time, as you would a car wheel.
The Bottom Line
To install a chimney cap, measure the flue, make sure it is clean, empty and sound, then fit the cap level and fasten it the way the maker designed: bolts or a band on clay tile, a clamp on a liner, the listed lock on metal pipe, anchors on the crown. Do it only with safe roof access and fall protection. If the job is steep, high or complicated, hire a sweep.
Frequently asked questions
Can I install a chimney cap myself?
Yes, most single flue caps are designed for DIY installation if you can safely reach the chimney. Multi flue caps and difficult roofs are better left to a professional.
How do you attach a chimney cap?
Bolt-on caps tighten bolts against the outside of the clay tile. Liner caps clamp to the liner. Metal chimney caps twist lock or screw to the pipe. Multi flue caps are anchored to the crown.
How do you install a chimney cap without screws?
Some caps use a band clamp, a friction fit collar or high temperature adhesive on the crown. Follow the maker's instructions; never rely on a loose friction fit in windy areas.
How long does it take to install a chimney cap?
A single flue cap usually takes under an hour once you are on the roof. A multi flue cap can take a few hours.
Can you install a chimney cap in winter?
Only on a dry, calm day with no ice or snow on the roof, and with the chimney cold. Adhesives and sealants may need warmer temperatures to cure.